Data Management from Vincent Laforet on Vimeo.
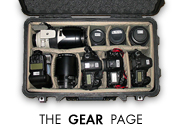
It’s been a busy few weeks so I wanted to throw this up on the blog today as I found a short pause int he schedule. You’ll find a quick overview of our workflow / gear for our travels in the video above, along with a 53 minute look into our Adobe CS5.5 workflow that applies to both Canon / HDSLRS and RED footage in the video below courtesy of Richard Harrington.
[This is part 4 of a series- Click HERE for PART I, HERE for PART II– as well HERE for workflow suggestions, and the original video EPIC #308 that this behind the scenes footage was shot for.]
Data management these days is becoming an issue for everyone – these still and video cameras are shooting what once were considered INSANE amounts of data. Whether you’re shooting a Panasonic AF100, Sony F3, a Canon 5D MKII on time lapse (let alone multiple ones at once!) or a RED Epic – we all have to thank our lucky stars that the price per Gigabyte for hard drive storage is dropping as quickly as it is. I bought a series of 6TB+ RAIDs 3+ years ago and paid well over $10K each… you can now get a solid 8 TB RAID for just over $1,200 and that’s a life saver.
One of the most difficult parts of taking the Red EPIC out on the road was the data management that came along with it (it was actually the handling of the large files, not necessarily their size – but that is a factor too of course.) We shot everything in full 5K resolution, which translates to around 3-5 GB of information per minute of footage (depending on compression settings.) If you are shooting with HDRx, you need to double that figure. We also had a Hasselblad H4D out on the road with us, which shoots 40 MP files, and our EOS 5D Mark II, EOS 7D, and EOS 1D Mark IV shooting hundreds of images in RAW format for time lapses, all of which yield similar amounts of data. We’re talking a TON of data, and required some serious media and computing solutions.
To deal with the RED footage, we used the second largest RED card available – the 128 GB SSD (The largest is a 256GB SSD.) When dealing with the Canon footage we used 32GB Lexar Professional 600x CompactFlash Cards. A quick tip: once the cards are full of footage, we flip them upside down in our card wallet so we know they are full of new data. Our solution for the RED SSD cards is less creative, but equally as effective – we wrapped the end with a small piece of tape that would keep us from inserting it into the camera again. We’d also put one piece of take for disk 1, 2 pieces of tape for disk 2 etc – also all of our cards are labeled with both the card/SSD number, as well as contact info (should the card ever get mixed in with anyone else’s…)
Once the footage was shot we ingest it via a MacBook Pro. This required two types of readers, a 1.8" Red Station RED MAG and a Lexar card reader, for the Red and Canon media, respectively. In order to ingest the information quickly, we use an E-SATA connection whenever possible (this requires AC power for the the readers – but does chop down the copy time for a 128 GB SSD from 51 minutes to approx 21 minutes – the bottle neck in this case is copying everything over one same port – so make sure you have a hard drive with E-SATA as well whenever possible.) As thunderbolt becomes more popular I’ll share my experiences with that as well – I’m currently testing one of the new Promise drives. For now – the standard is still pretty new and I’m waiting for both RAID solutions, as well as small bus-powered drives not to mention readers. I think we’ll have to wait until fall/winter for that to happen.
For the ingestion of the Lexar cards, we use a combination of USB and Firewire 800 – the latter of which is preferred. We then dump all ingested footage on to a G-SPEED Q drive, which is an 8TB raided system. These drives create internal redundancies across multiple independent drives which increases data reliability and performance significantly. I will never work off of a non-raided drive if I can help it. If money weren’t an issue (it always is) I’d only use SSD drives when I can’t use a raided system. Either way – the work should always be copied a second time IMMEDIATELY – and kept in separate locations. When we travel I have one RAIDED drive, and the client/agency/or my assistant has the second copy. They never stay in the same hotel room or bag for obvious reasons… and at times I insist they fly back on different flights (a bit extreme… but some of these are big jobs with significant liabilities.)
We also brought along a MAxx Digital Mobile Rocket, a bay that docks beneath your computer and contains a Red Rocket Graphics Card, which is essential for processing the raw 5k EPIC footage quickly. It doesn’t quite give you desktop performance, but it allows you to work with this footage from your laptop while on the road.
And here is the promised follow up post to my last tutorial with Richard Harrington. It contains a more in depth look into the Adobe interface and its features, and lays out our workflow, from importing footage into Premiere, and sending it roundtrip to After Effects and back. Check out the one hour tutorial below (you asked for it!) At some point I’ll cover the long term data management we use, as well as RAIDs, Drobos, redundancy and LTO tape.
Detailed Adobe Premiere & Dynamic Linking Workflow from Vincent Laforet on Vimeo.
The above video covers the following steps:
- Setting up a project with Premiere, including what settings are best to modify, and what settings are best to leave alone.
- How to bring media into your project through the Media Browser and use its features efficiently. Including how to organize clips, and bring them into your sequence timeline.
- How to best create your sequence with optimum settings for the video you are working with and how to set up an adequate number of audio tracks.
- How to set in and out points on your raw footage and either overwrite or insert a shot into your timeline, as well as a demonstration of Adobe’s patching feature.
- A demonstration of the ripple tool (which adjusts one side of an edit), roll tool (which adjusts both sides of the edit), the razor tool (which splices footage), and the rate stretch tool (which changes the speed of your clip).
- How to map your keyboard with custom hot keys, as well as set it up with FCP hot key commands (for those of you making the transition).
- A demonstration of how to use the marker tool to create points on your timeline, and how to automatically fill those markers with footage from your media browser using the "automate to sequence" function.
- How to admit that it’s okay to use the help menu 🙂
- How to quickly apply color correction within Premiere without exporting to After Effects or a third party application, with an overview of the different controls.
- How to import and edit your looks from RED CINE X into your Premiere timeline when you are working with RMD files, and how to bring those changes back into RED CINE X.
- How to use clip handles and apply and modify transitions between clips.
- How to send clips over to after effects from your Premiere project using Adobe’s Dynamic Link function, which updates all changes you make in both programs in real time.
- A demonstration of the After Effects Warp Stabilizer and its different stabilization methods. Also a demonstration of the Vibrance plugin, and how you can work with such plugins while others are analyzing.
- Demonstration of the Magic Bullet Colorista within After Effects (or Premiere).
- How to output/export your Premiere project using Adobe Media Encoder, which is 64-bit.
- How to create a "watch folder" that automatically encodes your footage to a preset codec.


