Blog

Shooting with the TS3Cine

The following is a guest post from two members of the LAFORET VISUALS team, Justin Hamilton and Jon Carr:

Justin: A few weeks ago Jon and I were fortunate enough to get to play with the TS3Cine from Fastec Imaging, compliments of Michael Sutton (@MNS1974) and Rule Boston Camera. I had been looking forward to getting my hands on this camera, as I have a huge interest in high speed cinematography, and the form factor of the camera was highly appealing – as its similar to a DSLR (though a bit bigger), and allows for the same run and gun style of shooting.  The camera shoots 718 fps at 1280×720 resolution, which isn’t going to let you shoot for features, but it is more than enough for web, and is still adequate for broadcast television (many channels still broadcast in 720p).  Still, the TS3 Cine can produce a really nice image as it has the option to shoot DNG RAW, which gives you great room for color correction (Jon discusses this in greater detail below).
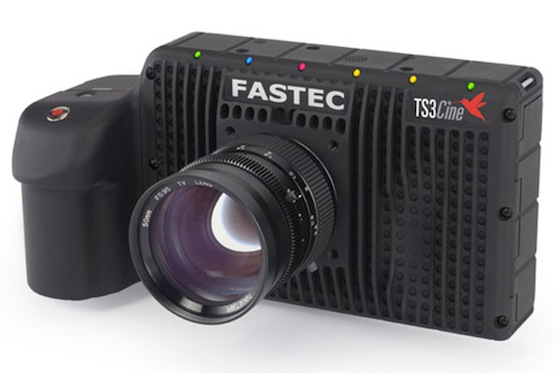
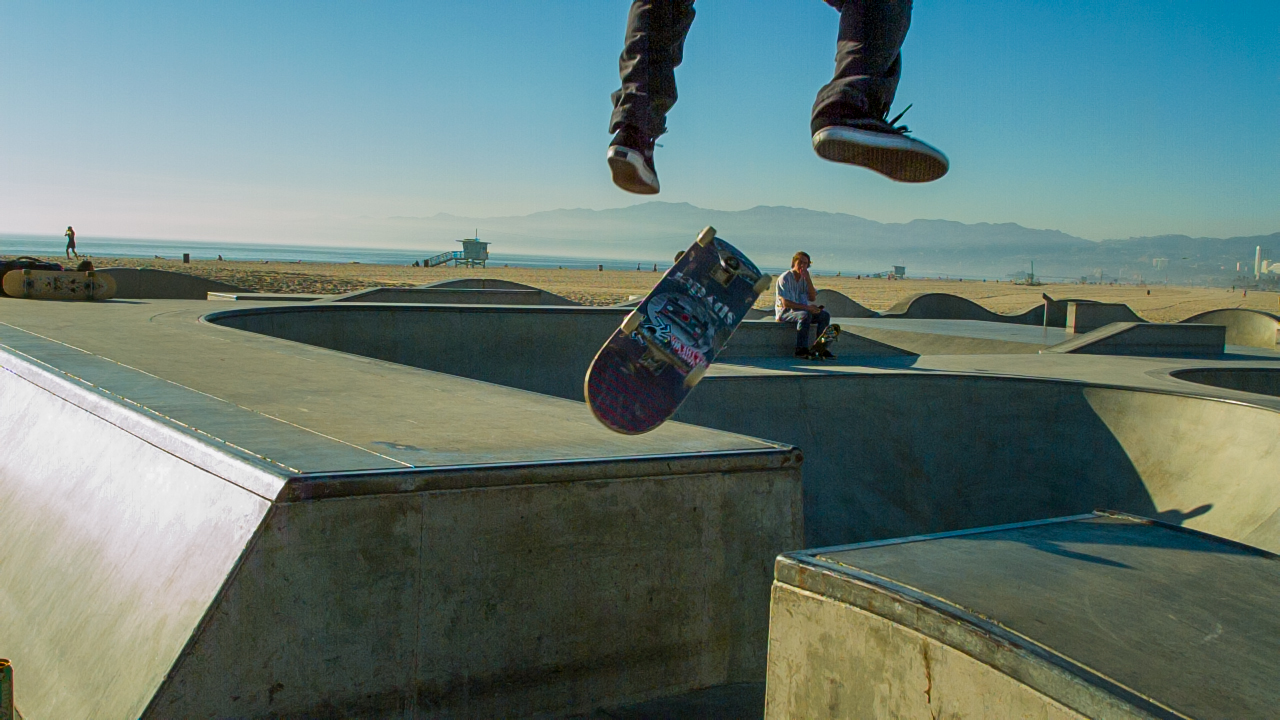
Given that we would need a lot of light to shoot something hi-speed, we decided to test the camera outdoors.  We called up our friend, Mauricio, who is an action sports shooter and has relationships with all of the skaters at the Venice Beach Skate Plaza – so skaters became our subject-matter.  It’s common with skate shooting to use wide angle lenses.  The TS3Cine model that we had in our possession was a PL mount, and we were able to use PL mount versions of the Zeiss CP.2 lenses.  Our widest lens was the 18mm with that set of lens (almost a telephoto by skate standards – many of these shooters use something in the range of 12-14mm, like the Schneider "Death Lens" to make sure they capture the trick and keep everything in focus.  The barrel distortion on a ultra-wide also helps to make the motion in tricks look more dynamic).  However, the TS3 has a smaller sensor, so there was a 2.4x crop factor contend with, which effectively made our 18mm a 43mm lens.  We also brought align the 35mm CP.2 in case we wanted to try something tighter (effective 84mm).  We found that we mostly stuck to the 18mm, but the 35mm did come in handy as we started to lose daylight because its a faster lens, with a T/2.1 maximum aperture, compared to the 18mm’s T/3.6 max.

We set out to shoot for three different days from roughly 3:30pm to 6:30pm to capture the best quality of daylight so we could attempt to pull off some p.  Now, the TS3Cine has a very large 7" LCD screen built into the back of it, but in direct sunlight, it is somewhat difficult to see, so we mounted a Zacuto EVF to the top of the camera so we could see what we were shooting a little better.  This was helpful for framing up our shots, but the camera does not output the display signals out of the HDMI port – so we were unable to see the waveform monitor on the EVF.  Focus also continued to be a challenge due to the small screen size, so we really relied on the focus marks and measuring our distance to the subject (old school).

The focal length we were working with was also a challenge for focus, so we started our first day by shooting most of our shots statically.  Naturally we worried about capturing things in focus at an effective length of 42mm because when you buzz focus in slow motion, it stays out of focus just that much longer.  By the day’s end however, we weren’t thrilled with our shots, as they just didn’t feel dynamic enough without camera movement.  So on day two we gave the camera to Mauricio to operate.  He’s a skater, so he was able to ride his board alongside the skaters or toward them as we shot.  To deal with focus we worked with the skaters to pick points on the bowl or ramp where they would do their trick, and then measured focus to that point, and pre-set the lens to be focused there.  We also cranked the ISO on the camera to 800 (it can go to 1600, but we decided to not max it out) and stopped down the lens as much as possible.  The only variable was Mauricio’s timing, but fortunately he was spot on.

In the end, we came away with some good shots, mostly thanks to the skill of the skater we were working with.  The lesson learned for us was that camera motion is just as important in hi-speed as it is at normal frame rates.  A static camera is a boring camera.  Don’t get me wrong there is a place for locked-off shots in filmmaking, but movement really brings things to life.  This is where the TS3Cine excels.  Because it is so small and light it’s easy to add movement to your shots, just with movement on skateboard or with your arms.  Keep in mind that when shooting hi-speed you have to move the camera quickly so that the movement registers when played back.

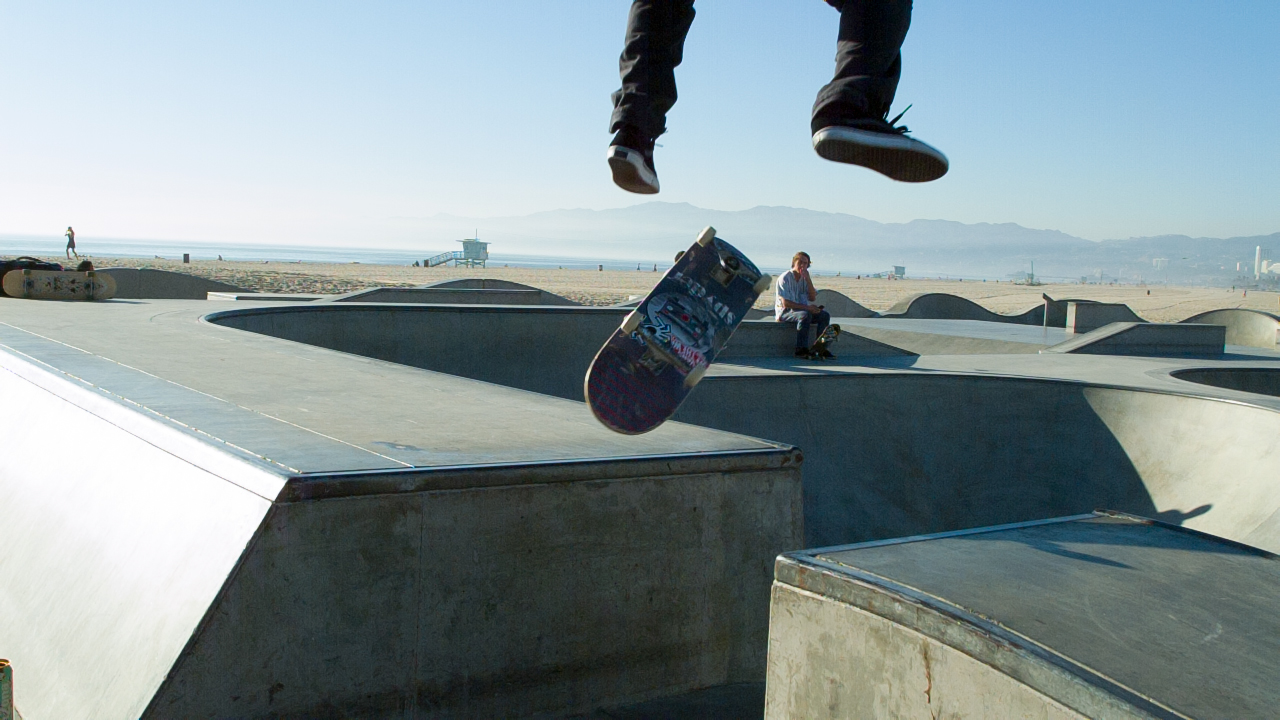
Jon: One of the things I like about the TS3Cine is that you have the ability to shoot a RAW DNG image sequences much like the Blackmagic Cinema Camera. This gives you tremendous ability to adjust exposure settings in post production. While the monitor of the TS3Cine is very large, it can be difficult to see in direct sunlight and during our run and gun shoot, so some of our shots where not properly exposed. The RAW image is much more forgiving and I was able to pull down highlights or pull up shadows to achieve proper exposures. This luxury wouldn’t be possible if we shot to the.AVI codec within the TS3Cine. 
 

(Click for FULL SIZE)
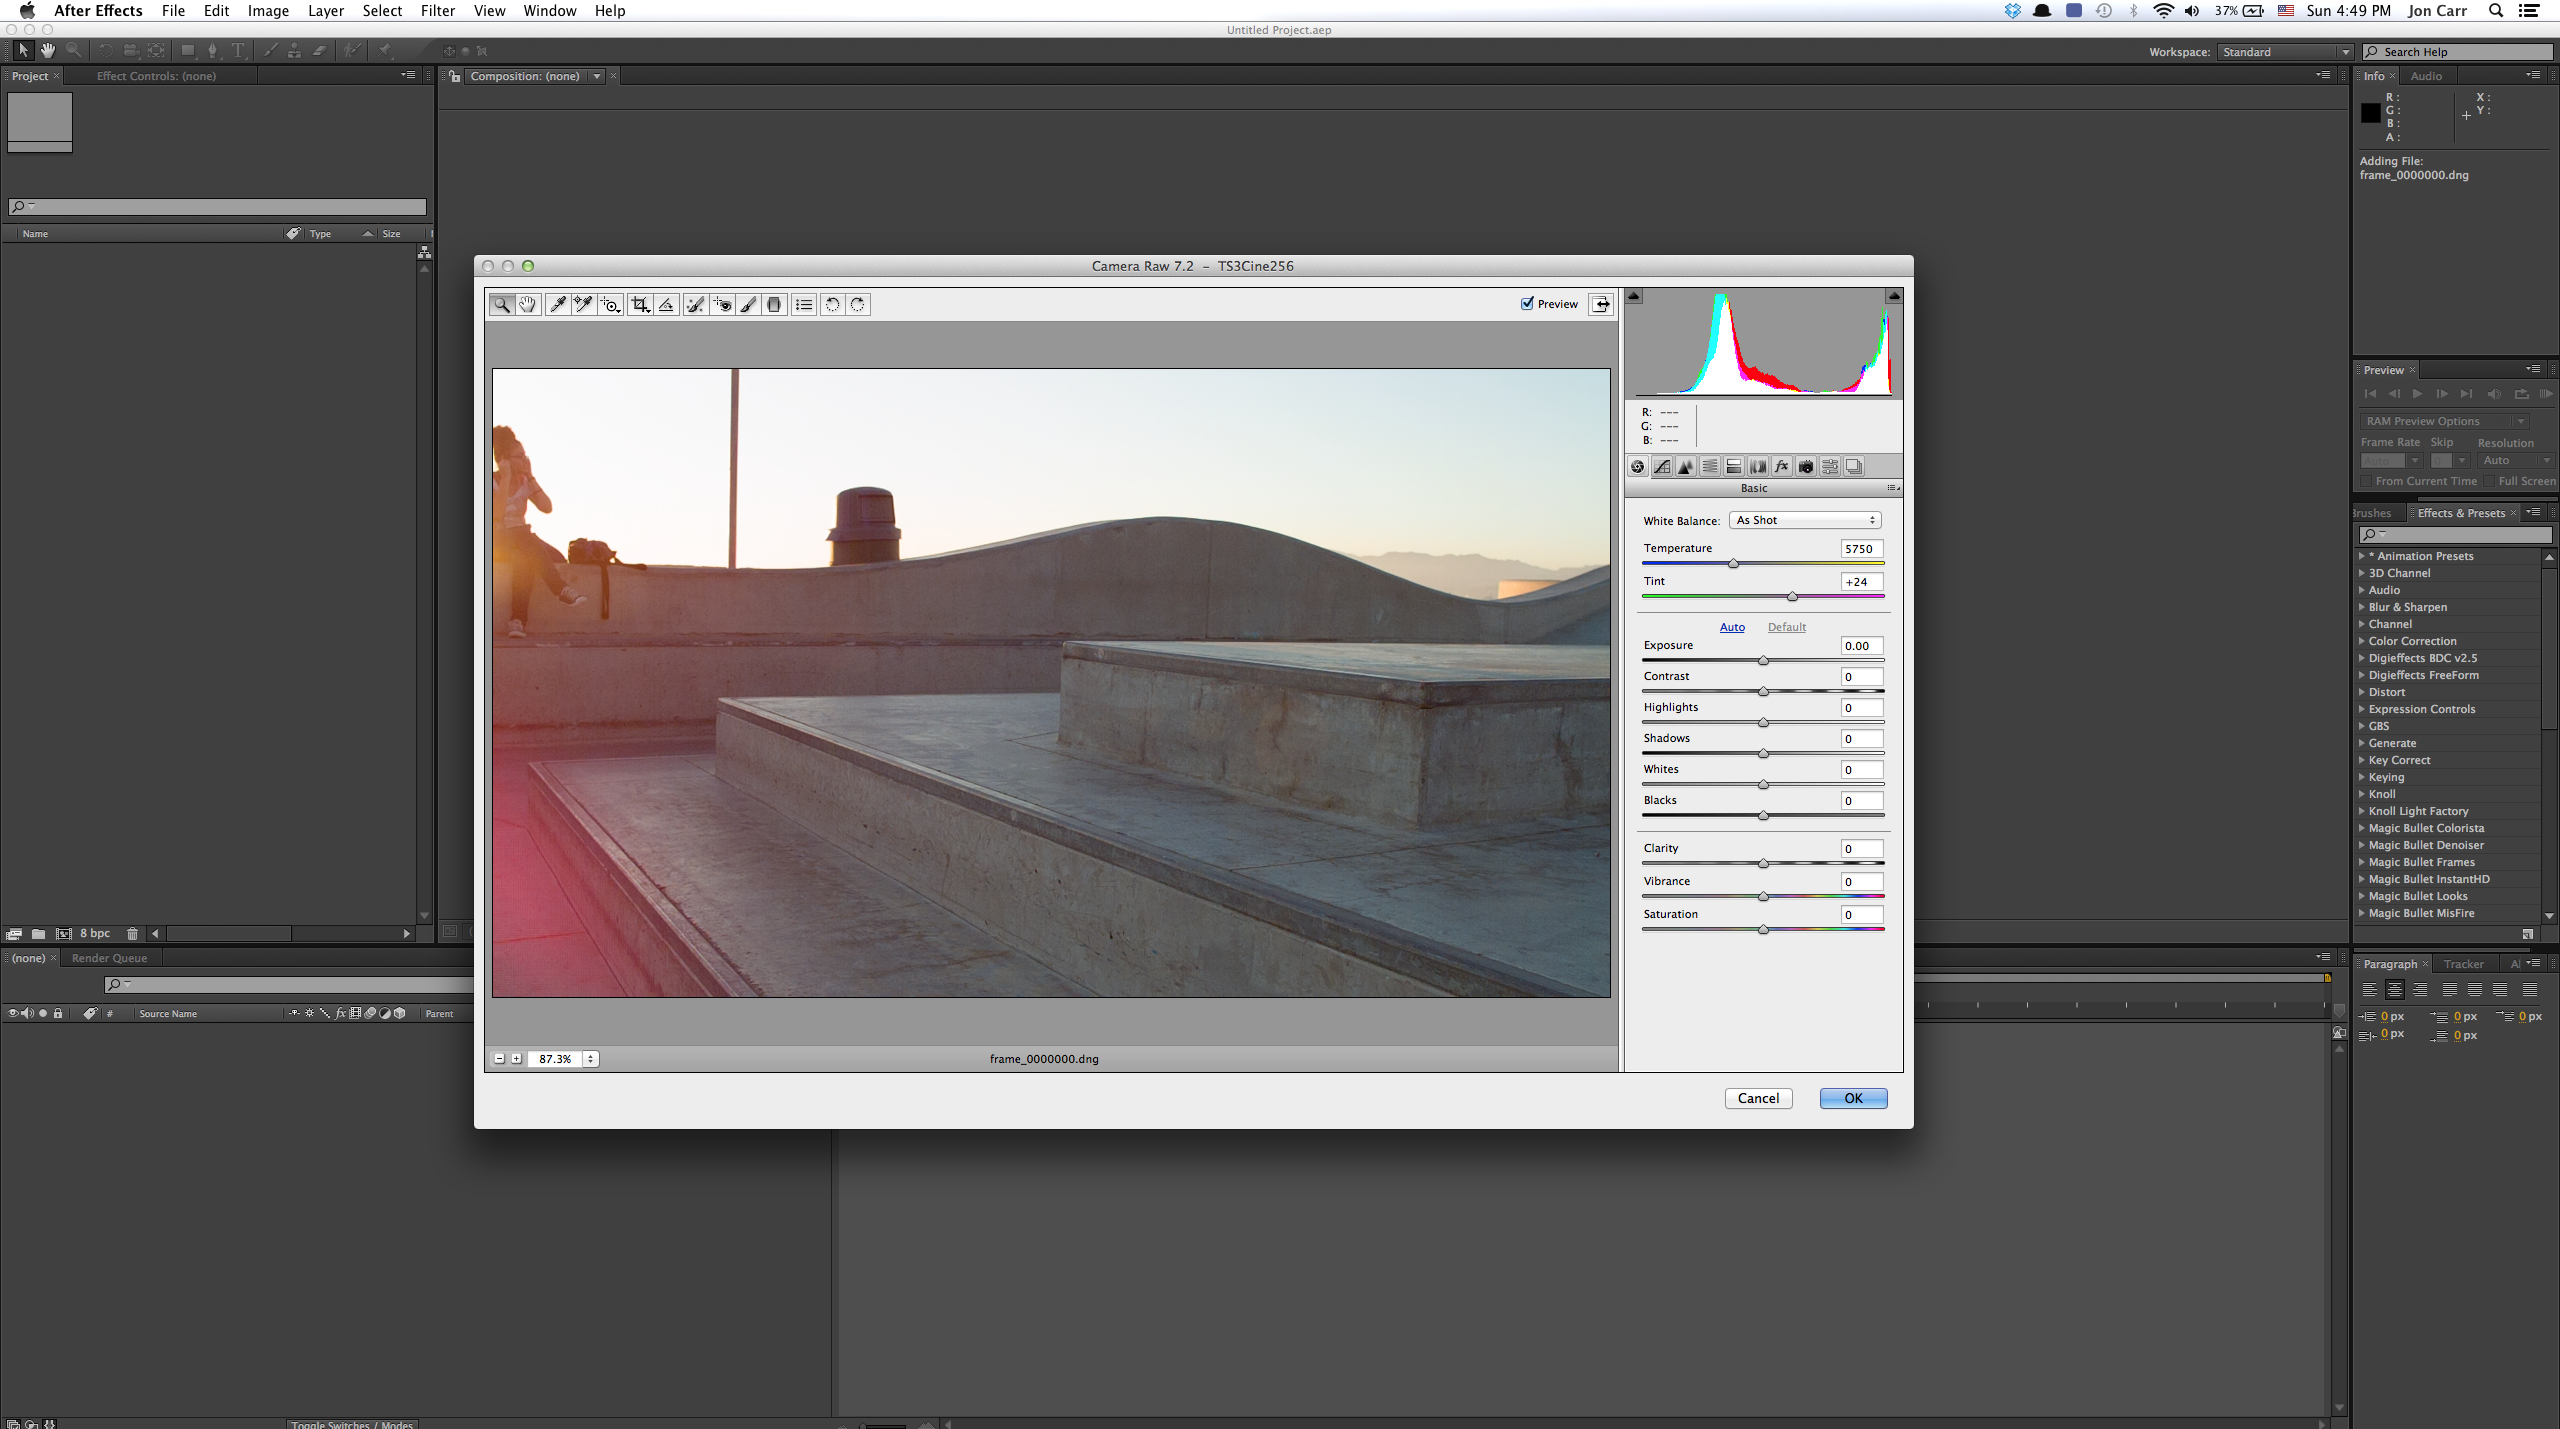
I used After Effect CS6 to process all of the RAW files. My technique is to import the RAW image sequence which brings up the RAW camera dialogue box within AE. I like to think the RAW camera dialogue provides the same set of controls minus the sexy packaging of Adobe Lightroom. This is also a very similar workflow for RED when jumping into REDCINE-X Pro to process .R3D files.
 
In the RAW camera dialogue you have the ability to adjust white balance and exposure. You can add simulated grad filters, crop, straighten, and even perform spot removal. It’s a versatile tool to optimize your image sequence and the reason I prefer to use AE.
 
Once I have the image looking good, I then interpret the footage by right clicking the footage in the project window. I select interpret footage and make sure the frame rate is set at the desired setting. Most often I use 23.976 but the default AE settings are usually 30p which will cause your image sequence to render improperly. You have the ability to change this default frame rate in the AE preferences. The final step is to option click the project settings to cycle the working space to a minimum of 16 bpc. This will help eliminate banding that can occur in areas of gradation in colors. 
 
 
Before (Click for FULL RES)
 
After (Click for FULL RES)
 
Finally, I drag the image sequence to the create a new composition icon. This creates the composition in the timeline. I set the beginning and end to select the duration of the clip I would like to render by using the B and N keys. I then render out a Prores 422 Quicktime file using the Render Queue. This workflow is more time consuming and it I believe it would be much faster running this image sequence through DaVinci Resolve but I have yet to test the TS3 files within a Resolve workflow mainly because I need to update my graphics card to properly run Resolve 9. When working with a small number of clips, the AE workflow is very manageable but if I had many clips I would probably go the Resolve route. 
 
As Cinema DNG becomes more common with cameras like the Blackmagic Cinema Camera, I look forward to native support with easier workflows that are sure to develop in the near future for our favorite Nonlinear Editing packages. Once you get a taste for the advantages of the RAW files it is tough to go back to a more compressed format. 
 
 
Justin is a filmmaker, shooter and producer based in Santa Monica.  Follow him on Twitter @justinphamilton
Jon is a film maker, editor, and post production specialist based in Los Angeles. For more information please visit www.joncarrpro.com or @jon_carr
For Rental and Purchase information regarding the TS3Cine, check out Rule Boston Camera.


Sony F5 and F55 announced

Well it looks like Sony hasn’t been asleep at the wheel after all…  truth be told they’ve continuously been releasing some pretty incredible still cameras (Alpha series) and some extremely strong contenders in the video/film business as well (FS 700, FS100 and notably the Sony F3.)  

I’ve definitely been watching on the sidelines and none of the video cameras quite got me hooked.   But I’d be lying if I didn’t say this new crop of cameras didn’t  immediately get my attention.  

The specs are perfect on paper and the layout… well it’s very Arri Alexa like to be honest in terms of the button layout.   

The package: modular.   But most of all – the specs.  They’re dead on.   Many of the Canon cameras’s specs (the C100, C300, C500) tend to be a bit off in my opinion notably in terms of frame rates and resolution, and notably when you compare them to their pricing relative to what the market has to offer.  

While the C-Series from Canon is built around an incredibly impressive sensor, color rendition, and low light performance – I’ve found that the frame rate limitations when combined with price relative to other cameras to be hard to explain at times.   Yet to their credit:  they cameras are selling well…

Now two things remain unanswered by Sony:  what is the price of these two cameras?   Philip Bloom has speculated an $18K for the F5 and $50K (body only) for the F55.  But that’s only speculation and I don’t like to quote prices unless they come from a trusted retailed or preferably a manufacturer.  

The second?  Image quality…  well, if it’s anything close to (or in between which is very likely) to somewhere in the middle of a Sony F3 and a Sony F65 … then this camera might just make waves.

For now:  just the specs please – straight from Sony.    

I have to say the ergonomics, modularity, native ISO, and the lens series… are impressive…  now we just need to see these in action.

Lastly:  man it’s getting tough to be in the cine camera market these days for just about anyone…  the heat is definitely on.  

Up next on the slate:  

Panavision is set to announce their next series of digital cine cameras early next year sometime, rumoured to have multiple digital sensor sizes, including something comparable to 70mm film in size and rez….    the market is getting crowded.

Also of note:  RED just announced they would be lowering the price of their Epic cameras given that they have recouped most of the R&D costs… or was it because they knew the Sony announcement was around the corner 😉  Who knows…  they definitely beat Canon to the punch when they announced their ($10K) Scarlet ahead of the  ($17K) Canon C-300 launch in November of 2012.

I also got to play with the Epic Monochrome this past week.   I have to say that if their Dragon sensor (expected early 2013) is anything like what I saw on the Monochrome in terms of low light performance, low noise, and dynamic range… well – let’s just say it’s a whole new ball game once again.  

I shot the Epic Monochrome at night in NYC with Canon K35 lenses…. and the last time I had as much fun shooting at night was… well shooting "Reverie" with the Canon 5D MKII 4+ years ago…   except this time I was shooting in full RAW and at 5K and in gorgeous black and white… wow.   This is becoming a hackneyed saying: but damn it’s a good time to be a filmmaker!

So the specs, from Sony:

Sony PMW-F5 and PMW F55.

Both come equipped with Super 35mm CMOS 4K sensors – 8.9 million effective pixels.  Both allow for 16-bit recording (via an external recorder – the AXS-R5 recorder).   The F55 however has a global shutter, and should have a higher color gamut, slier to the F65.  

Both cameras super sample the 4K Sensor to give you the follow recording options with no crop factor:

SONY F5:

The following all record internally to Sony’s SxS Media. (Click image b slow for full size chart):

Frame rates:

  • 60 fps out of the box (XAVC HD). 
  • 120 fps with a planned upgrade (XAVC 2K/HD). Unique to this process, there is no line skipping or sensor windowing. So there’s no crop factor, no loss in angle of view. 
  • 120 fps 2K RAW, with the optional AXS-R5 outboard recorder and a planned upgrade, achieves high frame rates while retaining exceptional, 16-bit image quality. This not only ex- ceeds 12-bit RAW with 16 times as many Red, Green and Blue gradations. By design, it exceeds the capabilities of human vision! 

SONY F55:

The following all record internally to Sony’s SxS Media. (Click image b slow for full size chart):

Frame rates:

  • 60 fps out of the box (XAVC HD at launch; XAVC 4K, QFHD and 2K with a planned upgrade) 
  • 180 fps with a planned upgrade (XAVC 2K/HD). Unique to this process, there is no line skipping or sensor windowing. So there’s no crop factor, no loss in angle of view. 
  • 240 fps 2K RAW, with the optional AXS-R5 outboard recorder and a planned upgrade, achieves the highest frame rates most productions will need, while retaining exceptional, 16-bit image quality. This not only exceeds 12-bit RAW with 16 times as many Red, Green and Blue gradations. By design, it exceeds the capabilities of human vision! 

Both cameras are also capable of 4K/2K RAW recording via the AXS-R5 external recorder (pictured below):

4K or derived 2K RAW. Capture RAW at your choice of resolutions: the camera’s native 4K or beautiful, derived 2K. RAW recording preserves the greatest latitude for color correction and other post processes.

  • Incredible 16-bit precision. By design, Sony’s 16-bit recording captures more tonal values than the human eye can differentiate. Sony RAW retains 16 times as many Red, Green and Blue gradations as 12-bit RAW and 64 times as many tones per channel as 10-bit recording. Sony 16-bit linear RAW is also the ideal point of entry into the 16-bit linear Academy Color Encoding System (ACES) workflow.
  • Comprehensive production platform. More than an individual product, the AXS-R5 is the starting point for an efficient workflow. The AXS-R5 records onto sleek, optional AXSMTM memory cards, which are compatible with an affordable optional USB 3.0 reader, the AXS-CR1. Once on a PC, the RAW files can be screened using Sony’s free RAW Viewer software.
  • Simultaneous RAW + Onboard SxS recording. Instead of requiring you to patch together a science project, Sony provides a coordinated “off-line, on-line” workflow with simultaneous recording to internal SxS cards and the optional AXS-R5 RAW recorder. For seamless conforming in post, you get matching time code, start frame, stop frame, file names and other metadata. The camera supports the following RAW + Onboard combinations:

SONY F5:

  • – 4K/2K RAW + XAVC 2K*/HD
  • – 4K/2K RAW + MPEG-2 HD422

SONY F55:

  • – 4K/2K RAW + XAVC 2K*/HD 
  • – 4K/2K RAW + MPEG-2 HD422
  • – 2K RAW + XAVC 2K*

MODULARITY

(From Sony): "[Both cameras are] exceptionally small, light and modular, letting you build up the right configuration for each job—or each shot. For example, you can add the optional AXS-R5 RAW recorder whenever you need it. Or go with internal HD recording whenever size and weight are the highest priority. The time code/genlock connections and XLR audio inputs are built into two modules you can add or remove as needed. Small size is particularly welcome in stereoscopic 3D shooting. The chassis is only slightly wider than a typical PL mount prime lens, perfect for both mirror rigs and side-by-side configurations."


Traveling with the RED Epic

I have spent a good portion of this year on the road, from Australia to Southeast Asia and back – and I made the point of  taking my RED across the globe.    What’s the point of owning such a camera if it lives on the shelves back at the office after all?

The challenge has been: how do you carry a digital cinema camera with you across the world, have the essentials you need to shoot, without lugging a number cases of gear with you everywhere?  

As I have said from the beginning, my favorite thing about the RED EPIC is how compact and portable it is.   It’s the closest (at 5K capable of 120 fps producing RAW files) that you can currently get to traveling with an IMAX camera today…

The beauty is that you can carry this camera in a backpack or roller case with you literally anywhere, along with all the accessories you need to shoot – which can’t be said of most high end cinema cameras – they’re simply too big and far too heavy.

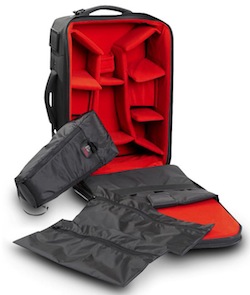
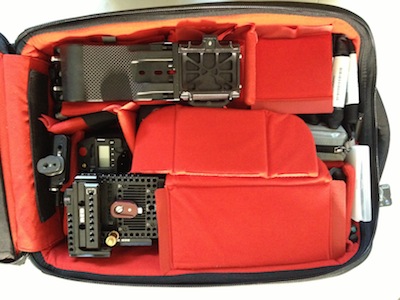
Lately, I have been using the Petrol DigiSuite DSLR Camera Case (pictured left) to house my EPIC and accessories.  This is a carry-on size roller case (much like the ThinkTank rollers I have used for over a decade for still cameras) but this bag’s notable difference is the heavier-duty customizable velcro padded inserts so you can customize the internal layout and the fact that it was designed specifically for DSLRs/Cine cameras and accessories such as matte boxes.

The interior has a length of 19.7 inches, width of 13.2 inches, and height of  8.27 inches.   While this bag is meant to fit in US Overhead bins on airlines – it is also built to protect your investment and keep your gear (that one normally packs in cases) safe.

When taking the EPIC out with me, I typically always have the Canon EF mount attached to the camera.  This allows me to use both Canon EF glass, and my Zeiss CP.2 lenses.  Usually, I travel with the 25mm and 50mm CP.2 lenses – my two go to lenses in general for cinema.  I’ve also been going around with two stabilized lenses, the new 24mm f/2.8 IS and 100mm Macro f/2.8 II.  These IS lenses are great for handheld work – the 100mm macro especially, I can often do handheld shots that look like they were shot on sticks.   If I do find myself wanting to rent PL glass for some reason, I bring the PL mount for my Epic just in case I get asked to shoot a job while on the road.

Depending on how I accessorize the camera, I also bring along two solutions for filtration.  In run and gun situations, I like avoid having to deal with rectangular filters and matte boxes, so I use a Schneider Vari-ND 77mm filter for the Canon glass with step up and step down rings.  

For the CP.2s I use 114mm circular filters from Schneider and affix them to the lens using an adapter that was originally designed for using circular filters with Angenieux glass (They’re still working on a prototype so I’ll let you know more when it’s available as a product you can buy.  Basically this allows me to snap the high quality Schneider ND filters directly onto the front of my CP.2 lenses)  If I do want to build out the full kit with the matte box, I use Schneider 4×5.65 ND Filters – though I won’t always travel with a full set, maybe just a 0.6 and 1.2, and a circular polarizer.

In terms of accessories, I try and bring enough parts so that I can either shoot quickly on the fly or be prepared for a more typical studio setup.  I always have the DSMC top mount attached to my EPIC body, and typically I have the DSMC plate attached to the bottom (which has a RED quick release mount and 15mm lightweight rod adapter for the front of the camera).  So when I need to shoot with the camera quickly I will throw the sliding top handle on the top mount.  If I want to build out a full shoulder mount I can attach the DSMC shoulder pad with the quick release platform easily to the bottom of the camera.  I can then throw on lightweight rails and mount my Arri FF-1 follow focus and OConnor O-Box.  The hand grips that I use are OConnor O-Grips, which I can attach directly to the side of the matte box.

For monitoring I travel with both the 5" RED LCD and the Bomb EVF.  I can attach the LCD to the camera body using 16×9 Cine locks, and mount the EVF to the top rail mount using the Spinner mount.  Which of these I use is totally dependent no the situation, but it is convenient to have both options. 

For power, I travel with 6 RED Volts and the RED volt charger.  These batteries work great for run and gun shooting – adding very little extra weight to the camera.  They don’t have a large battery life, but are completely adequate for trying to grab some beautiful imagery on the fly.  In the event that I need to use the camera on a more traditional shoot – I always pack my gold mount battery plate so that I can rent some Anton Bauers for extended camera battery life.

The one thing that is very important to note about packing my EPIC in a carry on is that I am always pushing my luck just quite a bit in terms of weight restrictions.   I’m playing with fire really. The kit weighs in exccess of 30+ lbs. when it is fully loaded, and around 25 lbs. w/ minimal accessories.  Airlines definitely frown upon these weights as the maximum allowed overhead compartment weight is 20 lbs. in U.S. airlines – and less so in international airlines.   I often try to sweet talk the airline personnel into stowing this in the front compartment which is doable when I get upgraded to business class – but nearly impossible in economy.  So keep this in mind as it’s also frankly dangerous.  However, if you are only fitting out your Petrol roller with a DSLR camera kit, weight should be far less of an issue for you.

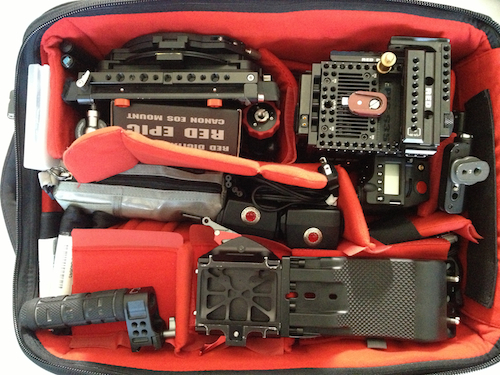
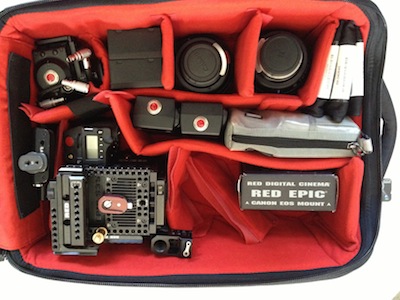
Below is a visual breakdown of how I pack the roller to fit my EPIC, EF lenses and accessories, in three stages.   Over the coming weeks I will go over some other solutions that I have been using – including smaller backpacks, as well as checked luggage cases to make this work.