Black Friday Gadget Guide
 I have an upcoming post for the holidays that will involve a few charities as I think that giving back and helping others is one of the best things anyone can do.
Today unfortunately, I’m going to digress into a more materialistic world… on the eve of the day Americans call "Black Friday" where they go to shop ’til they drop … I must (obviously!) admit I do love my gadgets…
If you’re looking for some advice on gear for the holidays – for you or for others – don’t forget to check out the My Gear Page on this blog. I share a ton of information, advice, and examples for almost all of the video / photography / accessories / support / sliders / time lapse / lighting / audio / software and photography gear I use on a regular basis.
By using the coupon codes below and by shopping MY GEAR page mentioned above – you help support us and the time it takes to update the gear section on this blog, and allow us to create more instructional videos to populate the section – and it doesn’t cost you a dime. In some cases (below) you’ll even get a discount.
Given how many videos/graphics there are on the list – please click below to see it. So without further ado:
1. Teradek’s "VTR" Cube Solution:
You can use the coupon code VL3D0012 to get a 3D Mic Windshield (a $89.99 value free) with a 3D Mic Pro or 3D Mic Indie purchase. The coupon is valid until December 31st.
How to use the coupon: Add 3D Mic as well as 3D mic Windshield in the shopping cart and then enter the coupon code at the very last screen before checkout. The cart will deduct the price of the windshield from price.
3. The new Marshall 9" LCD Monitor w/ Waveform monitoring.
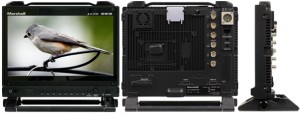 While the new Marshall OR-901-XDI ORCHID 9" LCD montor is not one of the "cheaper" LCD monitors out there – I found it absolutely critical to our shoot on Mobius. This is the highest quality portable Marhsall monitor I have used to date – and it has a critically important feature: a built-in waveform monitor. The waveform monitor allows you to monitor the exposure / signal of pretty much every single camera out there in the world – be it HDSDI or HDMI (on the same monitor.) In fact this monitor has loop through HDMI. I’ve used it w/ the 5D MKII, the RED Epic, the C300 and Phantom Flex cameras. Basically this is the one monitor I travel with everywhere at this point and can handhold on set. I either run a long BNC cable to the camera I’m working with (if I’m directing) or I use it in conjunction with the Teradek Cube for wireless monitoring. Marshall’s monitors just keep getting better – both in terms of image quality, angle of view, feature sets, and build.
4. O’Connor’s O-Box and O-Grips:
 My favorite mattebox and grips are the O’Connor O-Box mattebox and O’Connor O-Grips. There are a lot of great (and bad!) support systems out there…. I love this combination for a few reasons. For one – both of these units are great long term investments. They will work with you 5D MKII all the way to a Panavision camera. They are built rock solid. The grips NEVER slip. They are incredibly versatile in terms of shaping them to your particular needs as camera handles for handheld work. The mattebox has a feature few others have: you can connect the O-Grips directry to it on either side. This solves a particular problem with small cameras – such as the 5D MKII or the Epic and Scarlet: they are so small there isn’t often enough space to fit a follow focus system (manual or motor-based) as well as lens support and/or a mattebox AND grips – especially when you are using small EF lenses or ZEISS CP.2 lenses. When you’re able to use the grips attached to the mattebox – problem solved. There are also a number of mounting points on the top of the O-Box – you can screw in the cinetape, or a Zoom H4N very easily – another very nice feature on such small cameras where space and mounting points are at an extreme premium. I have actually demoed this system by doing full 360 degree spins off of the handles on the O-Box with an Epic package behind it… You may want to put both top an bottom rails on your system w/ the O-Box depending on how heavy your system is.
 Below is a photo of this system in use on a recent production. You can see how compact the RED Epic (or an HDSLR system becomes and how close to your head the system lives ergonomically – it’s nice to have the handles further out on the Mattebox – not to mention to have th ability to screw in an LCD or accessories on top of the mattebox.
5. The single best little accessory for filmmakers: 16X9 Cine Lock Quick Release:
 I’m so confident you’ll love this accessory – that I’ll recommend you immediately buy two – not just one. While we all love our HDSLR and RED cages – there’s absolutely nothing more annoying than having to screw in an arm, an accessory into a 1/4-20 mounting point when you’re in a rush (or trying to unscrew it.) The cinelock is a simple and elegant concept – and extremely well made. It’s a much smaller version of the Really Right Stuff / arca swiss plates we all now. You screw in the red base plate onto your cage or camera – and the grey slide onto your accessory. Then you can quickly slide in your EVF/ LCD / accessory pretty much effortlessly. There is no give or slide – it’s rock solid. This is how I quickly mount and unmount my LCDs/ EVFS and accessories on and off my cameras. It make packing and unpacking from a case a breeze. I can’t recommend these enough. I own 6 of them.
6. Tascam iPhone/ iPad audio microphone adapter:
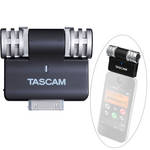
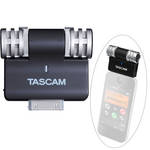 While I’m a very big fan of the Zoom H4n audio recorder and use it on most of my productions – I’ve got to hand it to Tascam for what looks to be a pretty awesome little iDevice accessory. This microphone allows you to use your iPhone / iPod touch / iPad to record audio with the Stereo Condenser Microphones and gives you CD-Quality recording. The software is free and I have to say – this is attractive for a lot of us out there who need to grab a quick soundbite. I predict this will be a nice little gift for any writer/reporter you know out there who regularly does interviews (although they better put their phone on Airplane mode during the interview so as not to be interrupted.) Tascam also makes a pretty darn good recorder of their own btw – which directly competes (and in some ways exceeds) the Zoom H4n – the Tascam DR-40 4-track Handheld Digital Audio recorder. This recorder has one notable feature – it will digital limit the recorder’s ability to clip a signal… it also offer 2-seconds of pre-recording… this one is going to be a hot little item… I look forward to getting my hands on it.
7. My three favorite bags – The Think Tank Airport Roller and the Petrol Rolling Case and backpack:
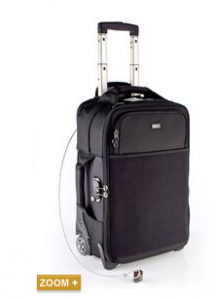 Think Tanks’ Rollers have been my go to carry-on bags for close to a DECADE. These are unequivocally some of the very best rolling bags in the market. I have covered 3 Olympics with them as a photographer (I own FIVE of these rollers! Three Airport Security bags and two Airport Internationals (a smaller version meant to fit in smaller international overhead bins.) And I swear by them. Why? Well they are built to last forever (and have excellent warranties should you have any problems.) They are inconspicuous – you can roll them onto your airlines without attracting too much attention. They pad your gear incredibly well. I’ve put entire still kits in there with 400mm 2.8 lenses – all the way up to my entire RED Epic kit. That’s how I travel – there’s no way I’m going to check my RED Epic/Scarlet or C300 with luggage. In fact I bring prime lenses in a second roller (or more to the point my assistant does) with hard drives and laptops in this roller on board. We only check the "other stuff." This case also has locking zipper, a waterproof cover, and a metal cable so you can padlock your case if you need to walk away or in my case to go cover the Olympics back in the day. I can’t recommend these enough. I should also recommend that the Airport International fits PERFECTLY in the Pelican 1620 roller case. If you’re looking for a perfect solution to ship your camera gear in – and when you arrive you pop open the Pelican case – and run out to shoot IMMEDIATELY with your Think Tank roller… this is the solution. It’s what I did for years while at The New York Times where I had to ship or check on gear – but had to hit the ground running when I landed. It also has built-in backpack straps in case you need to go over uneven terrain.
So what do I do with my other gear? Well – that goes into my Petrol PRB-15 Rolling case. UPDATE: SADDLY THIS ITEM IS NO LONGER BEING PRODUCED BY PETROL 🙁
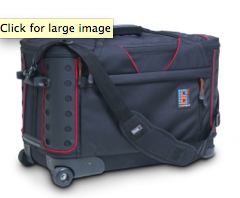 This is how I travel with my RED Epic kit in vehicles as well as my HDSLR systems. While I hesitate to check a $58,000 kit on f light – I have shipped my entire HDSLR Cage systems and checked them on flight regularly. This is an extremely well built case that has straps inside to hold your kit and of course all of the foam inserts you need. What separates this from the rest is a top shelf system. I put all of my RED and HDSLR accesories and tools on that top shelf inside the case. When I arrive on location I can pull the top shelf off and work with it on the ground, on a ledge, or back on the case once I’ve removed the camera. It makes like SIGNIFICANTLY easier when you have to work with tools and small parts – it in effect becomes a poor man’s camera cart. Do keep in mind that is DOES NOT fit in the overhead. This is a mid-size case that can carry and entire RED Epic package, w/ O’Box, Filter set, tools, 4 Anton Bauer batteries, a few Redvolts w/ Charger, and 2-4 CP.2 lenses… yea: that much… That’s why I love it. I own two of these – one for my Epic kit and the other for my Canon HDSLR kit.
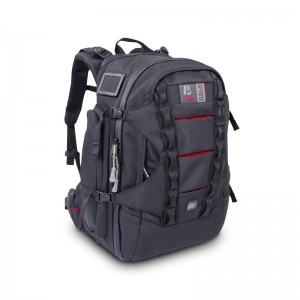 And while my back is not a big fan of backpacks – I use the the Petrol PD332 D-SLR backpack when I need to carry stuff over rough terrain. I’ve put my basic RED Epic kit in it, my DSLRs and Medium format kits for road trips where I know I may need to hike to a location. I’ve also fit my 15" Macbook Pro and squeezed my 17" Macbook Pro in it as well. The padding as with all Petrol products is exceptional – I feel safe putting $20K – $50K of cameras and lenses in this backpack…
8. Speaking of Macbooks – the 11" MacBook Air:
 I’ve slaved around the world with my heavy 17" MacBook Pro for years. For the past few months – I rarely if every use it anymore. I still own it of course – and I need it to work with high definition or RED footage. That being said – I am typing on the 11" Macbook Air right now – and travel with this computer only now. I do all of my presentations with it when I speak – and am able to play 1080p video on external projectors without a hiccup. My iPad is now my son’s … I never use it anymore. The Macbook 11" is almost the same size – and it has a keyboard and is a powerful little computer. In fact I have downloaded Nook and Kindle for Lion onto my Macbook Air. Gone are my days of the iPad for now at least. Gone are my days of travelling with a MacBook Pro as well. I now fly through the airport with an incredibly light bag – this laptop is such an incredible pleasure. I owned the very first MacBook Air and couldn’t stand it – it was far too slow. This little machine is a beast – and I never wish I had bought the 13" by the way. This is the perfect size for me. I use SPECK covers for all of my laptops and swear by them btw – this avoids dings and scratches on the nice aluminum bodies – and helps avoid impact damage.
9. Best Point and shoot camera – The Canon S95 Powershot point and shoot camera.
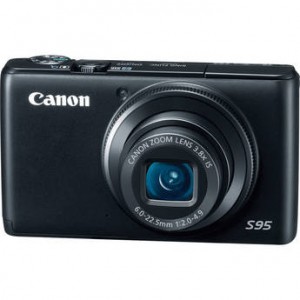 This is bar none the best point and shoot I’ve used for the price. It’s the one I recommend to all of my family, friends and colleagues – and the one I use. Why? While the Canon G12 and other cameras out there are great and often more feature-packed – this one has a few KEY features that separates it from the pack. First – it’s size. It’s smaller than a cigarette pack and fits in your front, side, back or shirt pocket – that’s KEY. 10 megapixels is more than enough for most but more importantly it shoots RAW (+JPEG) images. NEVER SHOOT JPEG images again!!!! It’s got a 3.8x Optical zoom (28~105mm equivalent range which is PERFECT.) It’s an f2.0-4.9 lens – very very bright for a point a shoot lens when you’re at its widest setting (by 1 to 3 stops over the competition.) 720p video – that’s all most of us need (unless we’re shooting 1080p with our iPhones.) Full Manual control of exposure settings which is key – and ability to focus manually with the front ring. At under $290 dollars it’s a very nice gift for someone you care about…
10. The TWO lenses I would travel the world with:
The single most common question I get from both photographers and cinematographers is: what 1 or 2 lenses should I buy for my Canon HDSLR?
Well here you go –
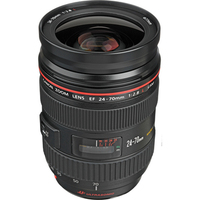 The Canon 24~70mm 2.8 and the Canon 70~200mm 2.8. I’d venture to say that 70% of all of the still images I’ve shot in my career were taken by one of these two lenses. For those starting in HDSLR filmmaking – the 24~70mm is bright enough for almost any environment – and has the absolutely perfect range of focal lengths. 24mm is as wide as you’ll likely want to go for cinema, 28mm and 35mm are standards. 50mm is the perfect cine focal length and 70mm is nice an tight on a 7D or Rebel.The 70~200mm is the gold standard of long zoom lenses. In fact this latest version is so sharp – it brings into question the need for primes. When combined with IS and the new higher ISO cameras – this lens is unbeatable. There are two main lenses every photojournalist owns – these two. There are two main lenses every fashion photographs owns – these two. There are two main lenses every sports photographer owns – these two. There are two main lenses every nature photographer owns – these two.
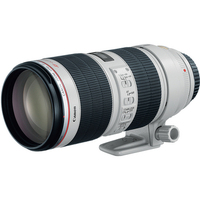 I think that makes my point. So while these may be a bit out of some of your budgets – they are definitely lenses to aspire to. You will use them for the rest of your lives on almost every single thing you shoot. I photograph my professional and family pictures with the 24~70mm a significant portion of the time. I use the 70~200mm (with a 1.4X converter at times) just as often and recommend it to all of my friends who want to shoot their children in their stage performances or sports.
11. And finally – My first book: VISUAL STORIES – Available in both eBook and in printed form (for those of you who may be visiting this site for the first time.)
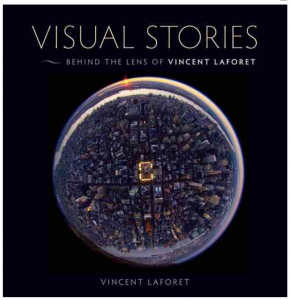 There is 35% off coupon on Peachpit’s site as well for a short time – use the code "PPE2011" when you check out to get the discount.
Here is a link to the hard copy: Visual Stories: Behind the Lens with Vincent Laforet (HARD COPY)
And a link to the eBook version: Visual Stories: Behind the Lens with Vincent Laforet (eBOOK)
For more information on the book and to see a few excerpts CLICK HERE.






Nice list! I wish the CUBE/Wireless systems in general would come down a bit in price point, but they are so much better than they used to be already. Hoping to pick up a 24-70 1:2.8 for my 60D for the holidays.
B&H says about PRB-15
Petrol is “NO LONGER AVAILABLE” … it’s a black black day!
Vincent Laforet Reply:
November 24th, 2011 at 7:40 pm
Nooooooo – will look into it ASAP!
Regarding Canon 24~70mm 2.8 is it not limiting the fact that this is not an IS lens? (for filmmaking not stills)
How does it compare in terms of image quality with the EF-S 17~55mm 2.8 “equivalent” for the APS-C? (for both filmmaking and stills)
Thank you
Vincent Laforet Reply:
November 25th, 2011 at 6:11 pm
I think you’ll find the glass is better than the 17~55mm – but truth be told I have not done side by side test. But it is not “L” glass. I can tell you the “build” of the 24~70 lens is significantly better / sturdier. That being said – for cinema (i.e. not stills) I’m sure the 17~55 is very very good and likely a better lens for smaller sensors given the range (it was built to be the rough equivalent of the 24~70 on full frame cameras – something like 27-85+ mm I believe)
Vincent,
I’ve been told by a french store that we can’t use the o’connor mattebox with small photo lenses.
Do you use it exclusively with big lenses like the CP2 ?
Vincent Laforet Reply:
November 25th, 2011 at 6:08 pm
I’ve used it with all lenses big and small – including Canon lenses. This is of course as long as you don’t use it as a snap on mattebox but off of rods. You can use donuts – it works just fine. Just make sure you get foam / rubber donuts to surround the smaller lenses.
Great list and some very cool gear on here I had never even heard about. That Cube system looks pretty rockin.
Would love to see some prices somewhere on the list however, and maybe the recommended place to purchase!
Regardless, great list and thanks!
Neth
Vincent Laforet Reply:
November 25th, 2011 at 6:06 pm
Just click on the links to get prices rather quickly. 😉 Prices vary and it’s a pain to update as these links get visited for months/years to come.
have you tried the letus master cinema series? and the small follow focus from o’connor? I can find any review of this last one!
Vincent Laforet Reply:
November 25th, 2011 at 6:06 pm
I haven’t played w/ the Letus Master cinema series on production. It did look rock solid at the opening. I would recommend it for serious users but don’t have first hand experience yet. The small FF from O’Connor is intended for Canon / Still lenses – not for CP.2 or cine glass btw. Therefore I use the Arri FF1 or the larger O’Connor as a result and swear by them both.
Yes the petrol bag. I have a 7D with red rock Matt box plus a scarlet on order. I’m tired of pulling my rig to bits just to store it. This bag looked like a great solution. As its no longer avail any suggestions would be helpful. Thanks!
Vincent Laforet Reply:
November 25th, 2011 at 6:04 pm
I just got word that it was discontinued. Reaching out to Petrol for an update…
Nice infomercial 😉
and I might be a bit off topic here but If you had to choose between a PL of EF mount for the C300 wich one would you go for?
Vincent Laforet Reply:
November 26th, 2011 at 9:53 pm
Extremely tough to decide… I’d go w/ PL.
@Vincent Laforet, Thanks !
Hi Vincent,
I have just received a Red Epic and am researching battery power and mounting options.
I am intrigued by he picture you posted of the Epic with the O’Connor matte box, just wondering if you could tell me what the battery plate and battery are? and if you would recommend it for a lightweight travelling kit. Also how are you mounting a follow focus without any rods?
Thanks for the informative post, Cheers.
24-70, 70-200 are just std issue in all walks, i’d only add the classic 50mm to that. i shoot mainly wedding and i’d feel naked without these 3 pieces of glass.
Hi Vincent,
Your work is fantastic as well as the information shared on equipment. I’ll be checking in for reference when I get my new gear.
Not only for myself but I’m writing on behalf of Hal Hartley / Possible Films (Cannes, Sundance) We shot Hal’s latest featurette “MEANWHILE” on the 5D all throughout NYC and MEANWHILE is premiering in Poland at the PLUS Camerimage Film Festival Of The Art Of Cinematography this month.
We’d love for you to check out the trailer & other footage.
http://www.kickstarter.com/projects/260302407/meanwhile
http://www.possiblefilms.com/
Yes, it’s a Kickstarter Page but it’s the main platform where the trailer & other footage can be seen. Sorry, not looking to advertise in your blog. People who have pledged recommended that we share information with you in terms of equipment and workflow.
Thanks,
Matt
Love the CineLock 16×9 recommendation! I hadn’t seen it before, and it looks a little better than the iDC version I had been using:
http://www.idcphotovideo.com/store/arca-style-clamp
Have you checked out the new Roland R-26 recorder? Looks like it could be a superior replacement for the Zoom H4n:
http://www.rolandsystemsgroup.com/products/100093
Vincent Laforet Reply:
November 29th, 2011 at 10:23 pm
I haven’t checked out the Roland no. You’ll love the CineLock!
Can you give me advice on Mac Book Air. Do you run the base 128gb HD or suggest bumping up to 256GB on the 11 inch. How about i5/i7? Love to hear you run the base model.
Vincent Laforet Reply:
November 29th, 2011 at 10:22 pm
I don’t think you need the larger HD for the MBAir as you’ll use it as an e-mail/web and small task computer – for heavy lifting etc you’ll want a MBPro IMO
Thanks
Dan
great recommendations thanks, I agree with the 11″ best laptop ever, I also own a 17″mbp it sits at home now as a desktop.
I bought the 24-70 love it the 70-200 looks like a great xmas present to myself this year, suggest we all click the links to products on this page to help Vincent .
Vincent Laforet Reply:
November 30th, 2011 at 10:18 pm
Thank Chris. We should get our 17″ out on a date… they’re both very very lonely. Opened mine up for the first time in 2 weeks today… surprised it was still charged 😉 v
Have to disagree with the point and shoot tip, having use a few and the canon mentioned i still believe panasonic rules the roost in the point and shoots easily, despite the annoying knobs on top.
Vincent Laforet Reply:
December 3rd, 2011 at 2:20 am
I like the Panasonic Point and Shoots as well. GH2 especially.
I’m wondering if you’re OK with the Marshall 9″ not having pixel to pixel mapping. How do you get critical focus? I’m looking at the Marshall V-R1041DP-AFHD 10.4″ because it has pixel to pixel. Do you find the waveform monitor option- and other features – outweighs the need for pixel to pixel?
Thanks.
Vincent Laforet Reply:
January 20th, 2012 at 11:26 am
Waveform is CRITICAL to me no matter the camera – so yes – I’ll go for that any day at the expense of other features.