Here is a first look at the Jamie O’Brien project. This is a reel of some of the best shots from the 3 week project. I would like to point out that this first look does not reflect our ultimate goal of producing a more in depth documentary that includes interviews with Jamie and other influential members of the surfing community. One of the reasons that it’s taken me this long to get this short cut up on the blog is that we’ve been working on the two cuts simultaneously. My goal all along has been to NOT make yet “another surf film” as those have already been made and made very well by some incredibly talented filmmakers – and shot over a much longer period of time where budgets and time allow the filmmakers to wait for the perfect conditions / swell. During the 3 weeks in Hawaii – we probably saw 5 days of sun, and 2-3 days of decent (but relatively small) waves. I was well aware of some of these challenges (weather is always a huge factor when shooting in the winter months in Hawaii) and made a point from the beginning to draw upon my experience as a photojournalist to work towards producing a different type of film. I hope to be able to share that with you at some point in the upcoming months.
For now I hope you’ll enjoy this first look. I look forward to getting back to writing more regularly on this blog now that this cut is done. A huge thanks goes out to all of the crew members, the sponsors who provided financial and gear support (many of them prototypes) and of course to Jamie.
So I’ve gotten 5 e-mails from friends in the past 2 days asking me if I as “OK.” Yes the blog has been very very quiet – it’s been almost a month – believe me I know. The reason: well I’ve been busy working on the post-production of the Jamie O’Brien piece – trying to work on two different edits simultaneously. For those of you involved in video/film – I’m sure you can relate on how much time post takes w/ the moving image relative to the still image. I’ve also been busy returning a lot of loaner gear (some of it just made it back last week in fact) and billing, not to mention covering Obama’s inauguration for TIME magazine, and bidding on jobs including one that involved 19 cast & crew.
Oh and my wife is also very pregnant (29 weeks to be exact) – so a lot of my free time that I would put towards the blog is being transfered to spending some much needed time my 4-year-old son and wife.
My favorite new thing is falling asleep in my son’s bunk bed as we read books each night – which means I no longer run off to the computer every night to write blog posts…
So please be patient with me – I’m sorry for the silence – and thanks for the concern. There’s actually nothing at all to be concerned about!
(Due to the length and size of this piece I am putting it up at 720p.)
Please note that Tiffen and Formatt BOTH make screw on filters and 4 X 5.65 filters for the matteboxes. I use a variety of filters from both companies – I use 1-6 stop Neutral Density filters as well as a few 10 stop screw on filters. (The RED One camera became part of our production a few days before we left and we had to scramble to find the appropriate filters in time – luckily both Tiffen and Formatt helped save the day in last minute fashion.)
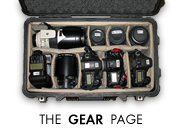
Both companies also make graduated NDs and Hot Mirror filters that cut out infra red light when using the RED One camera. The 4 stop and 6 stop are the NDs we’re using most often. I personally like the 10 stop to use my 1.2 lenses wide open in sunlight. Also – if you want to stay very light and mobile – I recommend you use the screw on filters – I travel with a set of 72mm and 77mm filters for my Canon lenses – but you could also buy a step-down adapter to screw on your 77mm filters onto your 72mm if you’re looking to economize. I tell every friend buying a 5D MKII to: 1. buy ND filters right away and 2. an good video head (see the Gitzo G2180 below) 3. an extra battery for the 5D MKII 4. and look into audio (see previous posts for the Rode mic and other options.)
We’ve also been using a variety of Manfrotto Tripods and video heads that we mention in this Behind The Scenes on this project that have allowed us to pull of some very nice pans of Jamie surfing. I can’t overstate how important it is for you to get a good tripod set to shoot nice pans – and you’ll need the heavy duty stuff to shoot with the heavier RED and long Canon glass. If you want a simple setup to start off with a 5D MKII and shorter lenses – we’ve found the Gitzo carbon fiber tripods and the Gitzo G2180 Fluid head to perform quite remarkably (but don’t overload it or any fluid head with weight – unlike still photography you can’t really get away with overloading a head with video as your pans and tilts will suffer.) Another really nice option are these self-standing monopods by Manfrotto that I recommend you use with a quick release plate.
Check out the RedRock Micro DSLR Rig and long lens support that I’ve mentioned in the past as well as the Wicked Circuits EF Lens adapter for the RED One Camera.
I will be posting a DETAILED list of all of the gear described within this and the first behind the scenes clip in a few days after we put up the 3rd installment of the Behind the Scenes up (it’s a long list and I want to add links so it’ll take me a better part of a day to do and we’ve only got a few days of shooting left on this project.)
 So I’ve gotten 5 e-mails from friends in the past 2 days asking me if I as “OK.” Yes the blog has been very very quiet – it’s been almost a month – believe me I know. The reason: well I’ve been busy working on the post-production of the Jamie O’Brien piece – trying to work on two different edits simultaneously. For those of you involved in video/film – I’m sure you can relate on how much time post takes w/ the moving image relative to the still image. I’ve also been busy returning a lot of loaner gear (some of it just made it back last week in fact) and billing, not to mention covering Obama’s inauguration for TIME magazine, and bidding on jobs including one that involved 19 cast & crew.