Technicolor CineStyle Color Assist
Technicolor – a company that has been around for over 95 years dealing with the science of film coloring – is entering the DSLR world once again.
Their first foray into digital cinema game happened when they introduced the CineStyle Camera Profile for use with Canon HDDSLRs, and that was quite a success given how well adopted that picture style has become.
Now they are introducing a color correction tool that I think many of you will find of interest: CineStyle Color Assist and it’s available for an incredibly reasonable $99.00 on their new website. Additionally CineStyle Looks packages are also available for $19.00.
We all know there are many tools out there for color correction – from great plug-ins to full featured grading suites. Technicolor has taken a pretty interesting move here in that they’re trying to fill that gap in between – for those that want to set a look on set for example – and allow that look to travel all the way to their non-linear editors (FCP/Premiere) in a non-destructive way. Let’s face it – not all of us have the time to spend over a dozen hours taking tutorials on high end grading tools such as Davinci Resolve… The beauty of this software is that it allows you to do only as much as you want, or need to. You can get quite far in terms of how far you push an image within this software – or you can do some very quick adjustments on set and send those over to your colorists with a sidecar file – if you’re a DP on set for example. CineStyle Color Assist does all of this – but stops short of going into secondary windows and nodes – something that you’ll find in full-featured grading software.
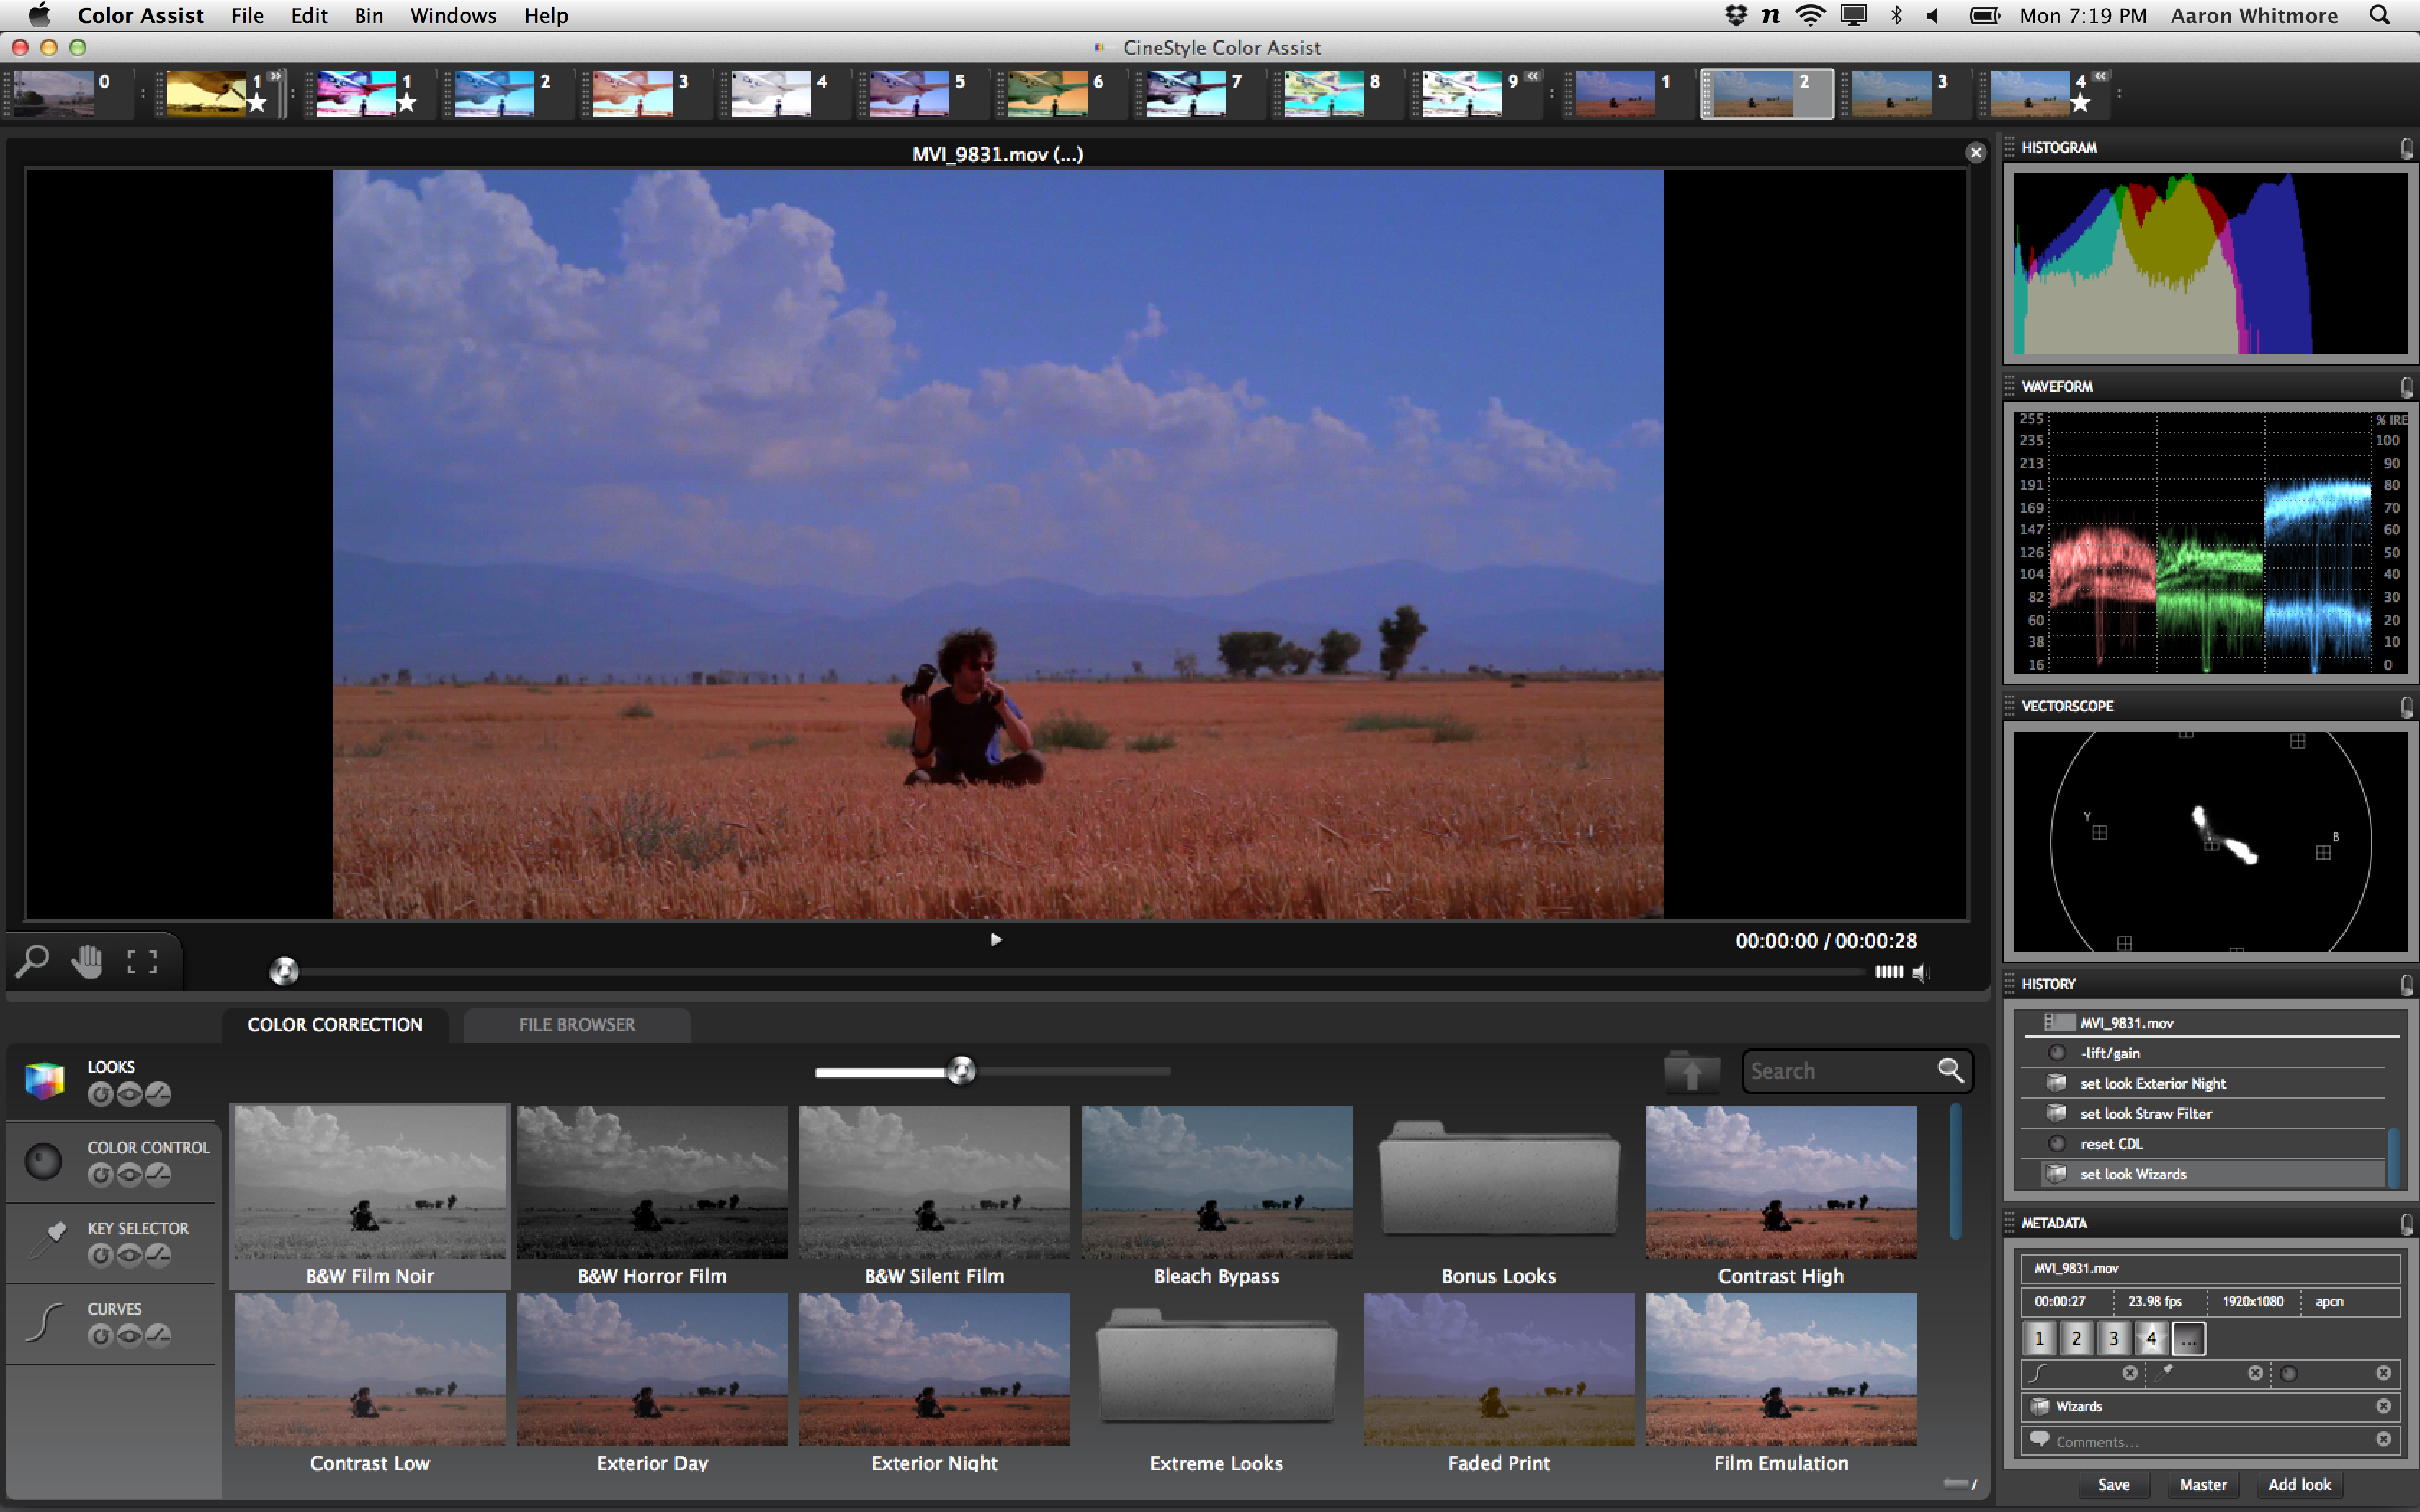
CineStyle Color Assist Tool operates as a stand-alone application that also integrates with Final Cut Pro 7 or Adobe Premiere Pro 5.5/ 6, linking your color correction profiles back to your editing timeline. The program has an incredibly friendly interface and comes with 25 pre-packaged "looks" that were designed by Technicolor’s colorists. Of course, you can also design your own grades and presets.
The tools packed with Color Assist include your basic color correction using three-way controls for Shadow, Midtone, Highlight, and Saturation adjustment. There is also a secondary color correction function called the "Key Selector," which allows for defining and adjusting specific colors or ranges of colors. Lastly, there is also a curves adjustment control.


As I have stated in the past many times on this blog, I highly recommend shooting with a flat picture profile, such as the Technicolor CineStyle Profile. This essentially let’s you shoot in a flat curve that gives you more range to work with in the color correction process. So If you did shoot with this profile, or something similar, Color Assist has a pre-fashioned S-Curve that you can throw on your flat image that places your clip in a more cinematic color space. You can then use the tools mentioned above to further stylize the look of your image. CineStyle is designed to work perfectly with their CineStyle picture profile preset of course. However, if you did not shoot with a flat color profile, you can apply a number of pre-made Log curves (2.2 Gamma, 2.4 Gamma, or Inverse S-Curve), which will flatten your image and better suit it for applying CineStyle Looks.
Still – it is absolutely BEST that you shoot with a flat picture profile to retain the most detail and dynamic range in your original footage.
The entire program is set up around the creation of .XCSL files, which Technicolor calls MetaColor files. These files are metadata that are saved in the same file as your video clip and under the same name. Each of these MetaColor files can save up to 9 different color compositions, which is handy if you are trying out a few varying grades. Whatever composition you have set as the "master" is what will be applied to your clip when opened in the Color Assist viewer or you non-linear editing software. There is also the ability to save a composition you have created as a .CSL file. These are custom "looks" which the user creates, and are saved with the pre-packaged "looks" under the CineStyle Looks tab.
It’s important to note that all of your corrections must be done within the Color Assist program; they cannot be done within the effects window of either FCP 7 or Premiere Pro. However, because of the MetaColor file being saved to the root director of your clips, you can easily link your footage back to these files with the Color Assist plug-in in either of those programs and effectively do round-trips.
I can’t help but think about how this workflow allows your DIT (if you have one!) or DP to begin doing basic color corrections on set. S/he can simply open all of the raw footage within Color Assist and begin a basic color pass or apply a basic curve to each clip. The MetaColor files are then saved alongside the original video clip, and when your editor gets the footage, s/he can link to the first pass at color correction and work with nice-looking footage. You can even take the footage w / you after a shoot, do basic color correction, and e-mail only the .XCSL files to your editor/ colorist for example. While your colorist may end up using a different piece of software for the final grade – they will have a great reference for the creative direction in which you are trying to push the footage.
Given the low cost of this software this is actually an extremely realistic workflow for many of us that don’t have access to the higher end solutions that Technicolor offers on set. In fact this is the equivalent of you doing a basic first pass without the bells and whistles (and cost) of doing a grade in a coloring suite – and can be quite a time saver (albeit make sure you’re aware that you need to pay close attention to your scopes if you’re not working with a calibrated monitor, and you should do your best to calibrate your laptop/cinema etc display regardless.)
Of course you can launch Color Assist straight from your editing software as well if you don’t want to touch the color grade until after the edit is complete. It’s a very similar workflow to working with RED RAW files and the RED plug-in in Premiere and now FCP X.
There are the typical tools that any colorist has at his disposal: a histogram, vectorscope, and waveform monitor. Each of these tools offers a way to visualize luminance and color values across the range of the image. All three can be incredibly helpful in making sure that you clip has a nice tonal range, no specific color is overpowering the image, and that you haven’t crushed out your darks or blown out your highlights.
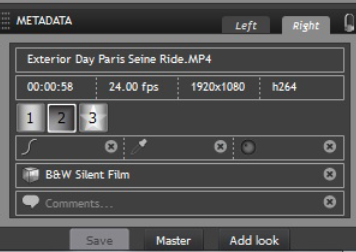
However, there are additional tools and features that don’t necessarily help with monitoring your corrections, but make the color correction process a heck of a lot easier. The first is a Metadata Window. This analyzes your clip for any embedded metadata: duration, frame rate, resolution, and codec type. It will also list the number of color compositions stored within the clip and allow you to set a master. Each color composition, when selected, also displays and allows the reset of the curve, primary, secondary, and looks that are utilized.
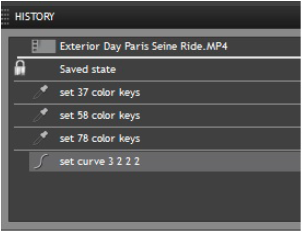
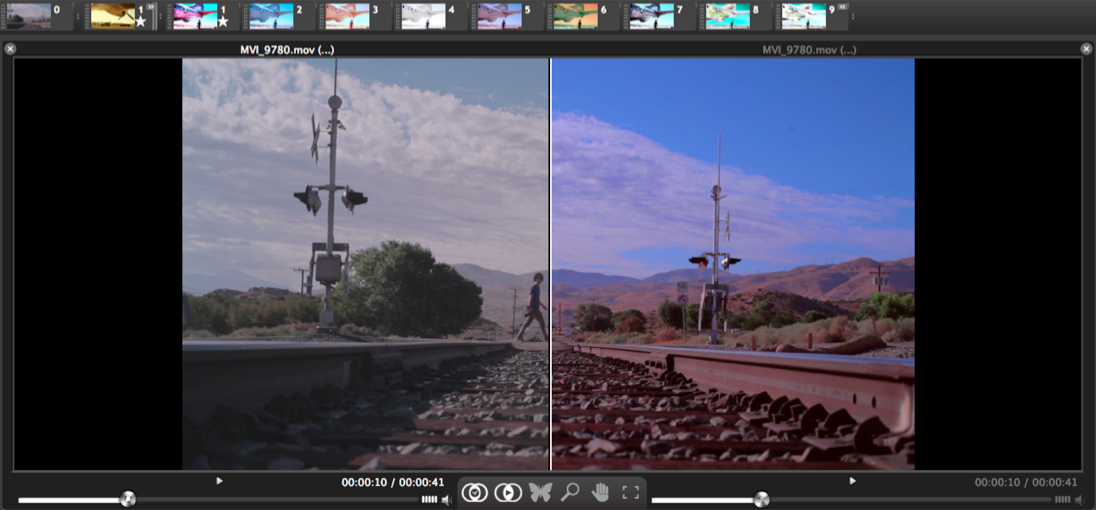
The second is a history window, similar to the one used in Adobe Photoshop, which features a running log of changes made to your current color composition. I find this incredibly useful, as I will often dig myself into a hole with a grade I am creating, so it is nice to able to backtrack and find where I made a decision I didn’t like. Additionally there is a split screen mode that allows a side-by-side comparison of the grade with the source footage, and render-free playback of your footage with an applied color correction – which is not standard to many color correction software out there.
In the coming weeks I will post a tutorial that goes in depth with explaining how to use the interface, and that delves into greater detail surrounding the different color correction controls. For now, have a look at the video above, which gives a basic overview of Color Assist, and hop over to Technicolor’s site to check out the program.
Technicolor Cinestyle is also doing a Facebook sweepstakes, giving away 1 Color Assist Package a week. "Like" their Facebook page for details on how to win. https://www.facebook.com/TechnicolorCineStyle







Nice piece of software but what a crappy demonstration video. I hate these software demonstrations where the guy explains each and every button you see on screen…
Vincent Laforet Reply:
November 28th, 2012 at 12:20 am
I’m going to give a go at a demo video next week – hold tight. I think a lot of people will dig this software – best – v
This looks like a great tool, especially as it could expand the role of the DIT. I have been on several shoots where the director didn’t fully appreciate the how the flat, log style images i had shot would look after a grade. Al3xa software allows to view the rushes with a LUT, but adding a grade to the meta data while the director, DoP etc are all there, makes much more sense to me.
Vincent Laforet Reply:
November 28th, 2012 at 12:38 am
I agree – I think people can really make a great use of this software as a first pass. I don’t know of a workflow that is this easy (and affordable) out there at this time. Although it has given me some ideas on how to work with this workflow with many cameras out there… more tk.
My understanding is that this will not work for FCP X? Is that right?
Vincent Laforet Reply:
December 9th, 2012 at 3:09 am
I’ve heard it both ways – so I need to clarify myself. I thought it would – but the literature says no. I’ll ask Technicolor to chime in ASAP.
@Vincent Laforet, The closest thing to this seems to be Magic Bullet Looks. I’m very excited for this software though and hope to get my hands on it as well.
Look forward to the tutorial and just experimenting with this myself. Installed today. For 99 bucks, why not!
Hi Vincent, I bought this software and tried both stand-alone and plug-in with Premiere Pro. But I still could NOT figure out how to link the original file and the MetaColor file, and thus view it in Premiere Pro and do further editing. I read every word your of above blog related to this issue. And I am surprised that 1) TechniColor even does not mention anything about this, that is, how to import or view the processed version of video apart from in the CineStyle Color Assist view window. I can NOT view it anywhere else, and 2) nobody on the Internet even mentions this issue.
I am now sitting here looking at the color corrected version of the clip only in Color Assist View window. I see the MetaColor file in the folder with the original clip but helpless and powerless trying to use it in other NLE software, and cannot even view it in QuickTime.
I can of course go into Premiere Pro now to use the Plug-In, but I have to re-do the whole process again from scratch again.
If this is the case, what’s use of Stand-Alone version and using it?
Can you please help me out?
Thank you.
I’m excited about the software but also disappointed I cant get it to work on Final Cut 7 without crashing..:-(
I bought the software one week ago. Did all the reading, watch videos and then installed it. I color corrected all of my project’s movie clips in a folder using Technicolor CineStyle Color Assist.
Then when I open my project through final pro 7 and tried to click on Link to MetaColor button, it’s keeps crashing.
I contacted Techicolor by calling and I sent my crash report to http://www.technicolorcinestyle.com/customer-support/. 4 days later they sent me a email with an attachment.
((((Please find attached version 1.0.1 of the Color Assist plug-in for Final Cut Pro 7 to replace the current plug-in you have. Please delete the FCP7 plug-in you received with your original purchase of Color Assist, and replace it with version 1.0.1 in the correct directory/folder.)))
I follow there instructions and FCP 7 is still crashing every time I hit the Link to MetaColor to link my clips..:-(
Any suggestions? I really could use some help in getting this software up and running.
Thanks in advance.
Does anyone know where to find the Plug In for the free 7 day trial? I downloaded the zip but there is no plug in anywhere to be found?
I was able to download the Mac trial version. But it doesn’t load up on 10.8.2. Anyone else had the same problem.
This blog article was an influence in my decision to purchase this product. the product go cancelled, but I was still able to use it. Now with the most recent update to final cut pro x 10.1 the tool crashes when I use it. IS there an alternative to this color board tool for people that use the technicolor cinestyle profile
Vincent Laforet Reply:
January 4th, 2014 at 11:25 pm
Greg – I’m afraid that Technicolor ultimately stopped supporting the product… and therefore we all need to move on to more current products that are being supported by companies as in this tech world, keeping things working with every changing cameras, software and technology, is a constantly moving target…
bonjour j ai besoin de logiciel technicolor color assist ou je peux trouver ce produit